A Players Position
Now that I can draw inside the 3d viewport I have to think about how to do so in relation to the players position on a map.
Setting up a map
The first thing I need is a map. So I reserve 256 Byte (16×16) address space for it and put a simple one in there using $01 for walls and $00 for empty space.
I also add some constants for the height and width of the map.
To have some point of reference on the map I add a player position and facing as well. I restructure the address space a bit and create a general game data area.
As for storing the current view of the player I first want to get his orientation. So I load the value stored at the player orientation address and start to shift it right until it reaches zero to figure out what orientation he is facing.
When I have figured that out I start the process of traversing the needed map bytes from the players position, facing north in this example.
First I get the players y position and get the address for that map row. Then I load the players x position substract two from it to get the position immediatly to the left of the player and store that in memory to get an offset to use for the rest of the loop. I load the data from that map address and store that in memory for later processing.
I increase the y register and store that map data as well. Increasing the y register once again gives me the position to the right of the player which also gets stored in memory.
I repeat the whole process twice more to get a square of three by three map tiles around the player.
Changing the viewport
Now that I have the visible part of the map stored in memory I have to get a representation of it into the 3D view. To achieve that I traverse through each map tile in order.
First I load the respective tile data and do a logic shift to determine the type of map tile. For now that only can be either bit 1 or zero but in the future each bit will be adifferent type, like doors and so on. Once I have found the correct type I return to the main loop and store the data in the first viewport strip.
The next one is a bit more tricky. Basically I have to add an offset for each strip of the viewport, to get the right representation of the map tile for that strip. So I first check if the returned data is not zero, in which case I would not have to do anything because an empty strip is allways zero. So I jump ahead to the storing of the data. If not I add the offset before storing.
I continue in that manner until I reach the strips representing what is directly in front of the player. As there are three strips but only one map tile I have to take a slightly different approach.
First of I check if the tile directly in front of the player is empty, as I simply can jump to one step further away and draw that. Equally I can skip the furthest tile in front of the player as his view is allready blocked.
Then I have to steadily increase the offset for each strip to get the corresponding id.
Testing
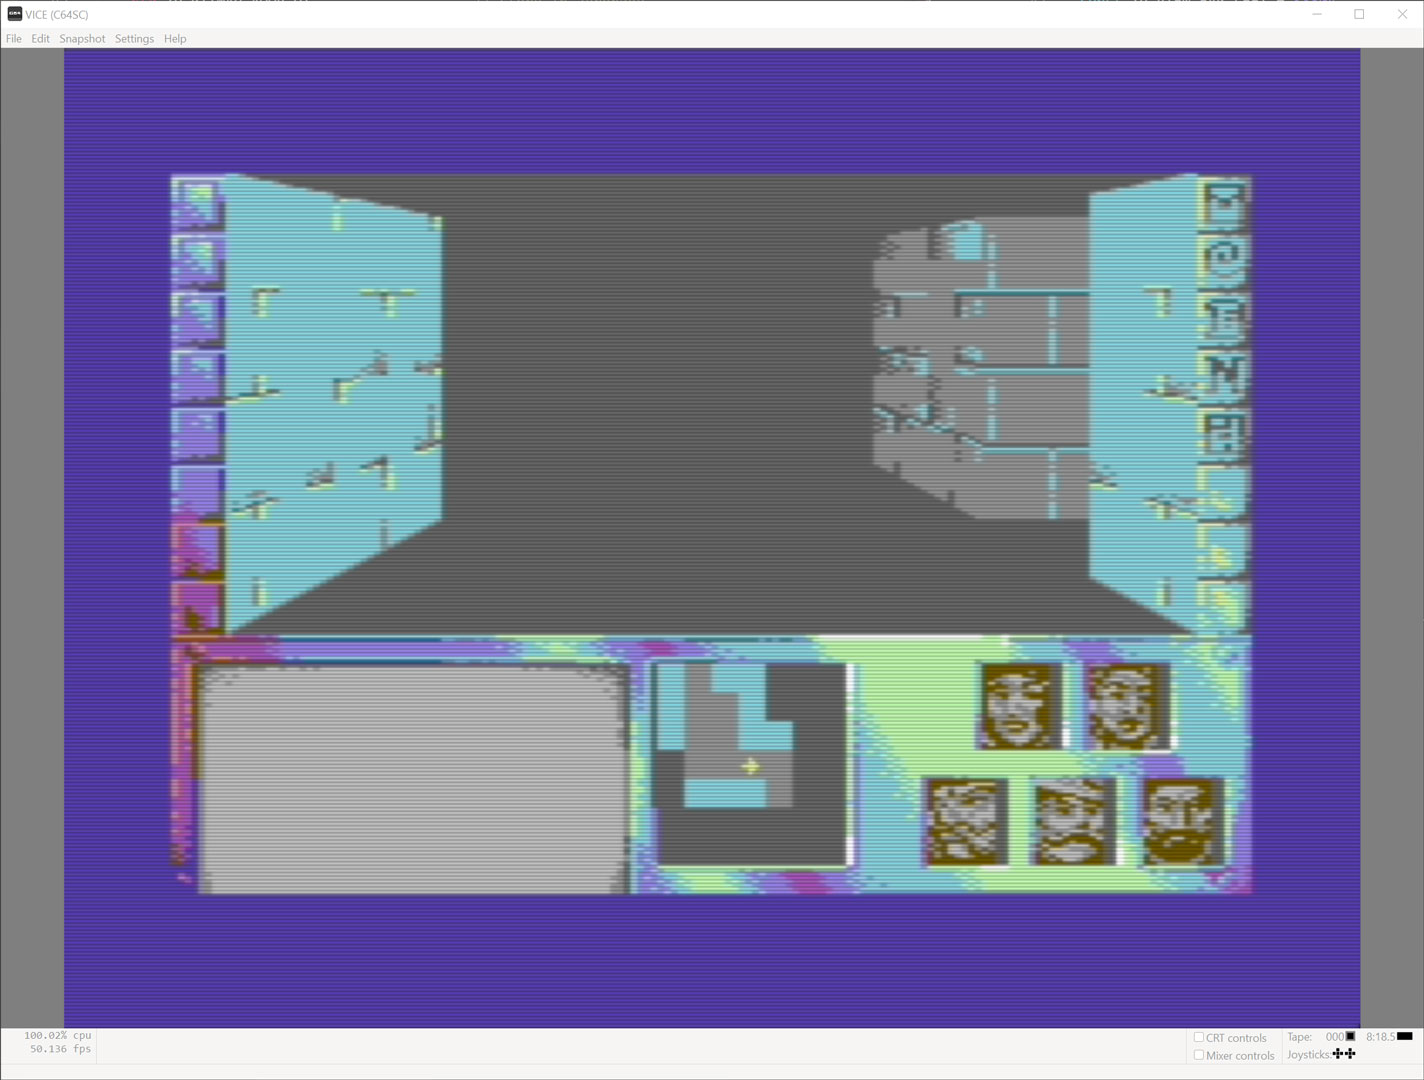
Running the code now gives us a strange but not unexpected result.
As the routine I have written so far does not take the sorrounding of each tile into account it is not yet able to accurately show what we would expect to see. So let’s change that.
Reworking the code
After a bit of thought I approached the storing of the map data a bit different than I first imagined.
Every map tile will be split in high and low nibbles. The low nibbles will contain the kind of tile (wall, door, etc) while the high nibbles will be used for additional data (maybe sprites for details like torches, etc).
As I traverse through the visible map I only take the low nibble and use the high nibble for information on its relation to its surrounding. This way I can have four kind of tiles and four states they can take (corner, straight, back, far). So a corner wall would look like this in binary: %10000001 or in hex $81.

Cutting corners
I have to add a check on the sorroundings of each tile I read to determin if it is a corner or a straight wall. So for facing north I will have to check the tile to the right for a left corner or the tile to the left for a right corner and the tile directly below that.
I take the lower nibble of the original tile and set bit eight (corner) or seven (straight wall) to one based on what the value of the sorrounding tiles was.
The next thing I might want to check is when the tile is empty if there is a wall behind that so I can fill the corresponding strip with the apropriate tile.
To do that I check the two tiles right above the current tile. If either one is containing a wall I set bits six (direct behind) or five (one field further) respectively.
Now I traverse the area the player should be able to see. Starting with the player position I read three rows (player position, 1 row ahead, and 2 rows ahead) of three map tiles horizontal (left of player, player, right of player).
I begin the process by reading the players y position, storing that into memory for reference and getting the starting address for that row. Next I get the players x position store that in memory as well and decrease it by one to get the spot left to the player.
Now I iterate through the fields using the previously written functions to check what to store in each view cell.
Storing in strips
Now that the building of the view has changed I have to work on selecting the corresponding view strips. It basically is the same as before but I added a bit of crucial code.
For every stored viewport tile I take its upper nibble to determine what I have to add to the basic tile offset to get the right tile.
The far stripes are a bit trickier because I have to take into consideration what the front stripes contain, to get the right strip. To achieve that I compare the value stored in the front to two distinct values to know if it is either a corner or a straight wall. If that is the case I can disregard what is stored in the far view tile because it would be behind the wall in front.
Testing
Now this looks more like a representation of our map data. That’s one orientation down, three more to go.
Viewpoint change
For the other orientations I basically do the same as for north, I just have to traverse the data a bit differently.
For example I don’t have to check the tiles in front of the current tile but to the right when I want to draw an eastern orientation.

Same with the corners.
When it comes to traversing all the visible fields I basically do the same thing as for the norht view. I simply store the resulting data in different fields.
After all that the code has become quite a beast and I opted for offloading certain parts into their own files.
I will have to refactor it again eventually, but that can wait for now.
Compiling the code
I added a loop through all four orientations to check that all of them get drawn correct. You can check out the video below.
The routine is still slow AF but for now it works.


The complete code listing.
build_mapview.asm
build_strips.asm
draw_view.asm


Leave A Comment